How to Find the Pitch of a Roof with a Speed Square?
The speed square is one of the common tools you’ll ever find in any contractor’s toolbox. And you may wonder why and what is it used for? Or even still ask yourself, what it is in the first place.
Well, a speed square is a tool used to find the pitch of the roof and marking the 45 and 90 degrees in the rafters. It is also used to guide the carpenter’s circle saws while cutting along the rafters. That is to say it provides a sitting for the saw to allow you to cut around while creating joints.
Here we look into a detailed step by step guide on how this speed sure is used to find the pitch of the roof. This guide gives you the steps on how to find the pitch of a roof using a speed square. When you know how to use a speed square well, it makes it not only simple to find the pitch of your roof but also safe.
What is a speed square?
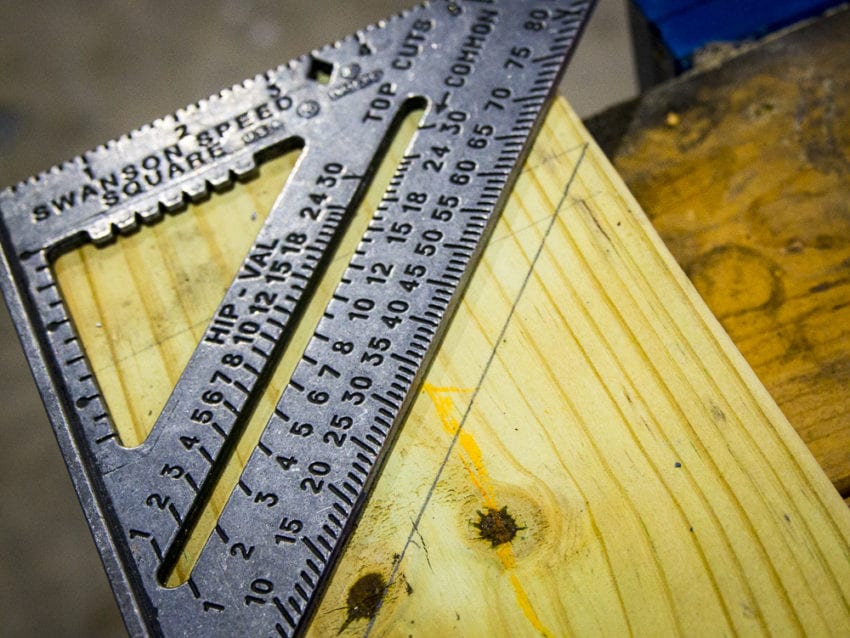
A speed square is a tool that is used to find the pitch of a roof very easily. The first speed square was invented by Albert Swanson in 1925. It comes in different forms like steel, aluminum, or even plastic.
The speed square can be found in many tool stores today. The original manufacturers of the speed square are the Swanson tool company. They have since given patents to other square manufacturers and hence the square is also available local under different names.
A speed square is triangular. You may wonder the conflict in shape and the name but it is simply explained by its functionalities. The speed square has three main aspects:
- The Lip
This is the section of the speed square that is used to attach it to the board. It is usually wider than the other parts which make it easily attachable onto the surface of the pieces of wood while in use.
- The Pivot
The pivot is found to the bottom left side edge of the speed square. Its purpose is to mark other angles than the 45 or 90 degrees. To achieve marking other degrees, you need to rotate across the board and measure any degree even irregular angle like 27-1/2.
- The Hypotenuse
Earlier on we saw that the speed square is triangular and just like a triangle has a hypotenuse, the speed square has a hypotenuse too. This is the longest edge of the speed square. It is used to read the degrees after measuring. The hypotenuse has the angles 0 to 90 degrees marked on it.
The speed square is also called a rafter square or triangular square. It is also many in one tool since it comprises a square, a miter square, and a protractor all in one device.
A speed square can be utilized for various functions. These uses include finding the pitch of a roof truss, measuring, marking accurate common and uncommon angles, and protracting.
[amalinkspro type=”showcase” asin=”B00002255O” apilink=”https://www.amazon.com/dp/B00002255O?tag=tikionline-20&linkCode=osi&th=1&psc=1″ new-window=”true” addtocart=”false” nofollow=”true” sc-id=”4″ imgs=”LargeImage” link-imgs=”false” specs=”The Speed Square, made in the USA since 1925, is essential for every carpenter, construction professional, roofer, and DIYer~~~Speed Square belongs on every tradesmans tool bench; includes Try Square, Miter Square, saw guide, line scriber, and protractor~~~Includes pocket-sized Swanson Blue Book, a comprehensive guide to help workers make correct angle cuts for any pitched roof~~~Features: 1/4-in spaced scribing notches and the Diamond cutout for easy rafter seat cuts and scribing the most common and popular stud widths~~~Gradations included for marking common, hip, valley, and jack rafters; Useful for determining and marking angles and making square cuts on boards~~~Heavy-gauge billet aluminum alloy construction is die-cast for increased accuracy over laser-etched and extruded stamped rafter squares~~~High-visibility, black gradations with a non-glare, matte finish for easy reading in any lighting conditions~~~Use this Speed Square to at-a-glance determine out-of-square corners, angles, etc~~~When used as a saw guide, the Speed Square makes truing up a board easy~~~Look for the trademarked Diamond cutout on all of our genuine Swanson products~~~” btn-color=”#ff9900″ btn-text=”Buy on Amazon” alignment=”alignnone” hide-prime=”0″ hide-image=”0″ hide-reviews=”0″ hide-price=”0″ hide-button=”0″ width=”750″]Swanson Tool S0101 7-inch Speed Square Layout Tool with Blue Book[/amalinkspro]
Finding the roof pitch using the speed square.
The pitch of the roof truss is also known as the slope. It tells how high the roof rises after every 12 inches in depth. To find this slope, speed square is the best-preferred tool. And to find this pitch accurately, you’ll need to follow the following steps.
Tools required:
You’ll need the necessary tools for you to get back good results. These tools are a Speed square, a level, and a pencil.
So to find the pitch of a roof using a speed square you’ll need to follow the following steps:
The first step is to use the pencil to mark a vertical line along with one of the edges of the rafters.
Then, placing the pivot point of speed square at the bottom of the rafter align the 90-degree pointer in line with the mark you made using a pencil.
Finally, you need to note the number that is parallel with the 45-degree angle of the speed square on its “common” scale.
The roofs rise is marked by the hash marks corresponding numbers between 1 and 30.
To find the pitch, read the point at the bottom where the rafter crosses the scale. This gives you the pitch of the roof or the slope.
Reading The degree scale.
No one should claim to know how to use the speed square without know how to read the different degree sections well.
Starting with the degree scale, to read the degrees, you need to place the speed square firmly along with the board. With the lip of the sure placed well along the length of the board and attached to it horizontally, ensure its edge is placed vertically to form a 90-degree with the bord of the rafter.
Next hold the square such that you don’t move the pivot even a single inch. Holding the speed square steadily at this position, carefully move the hypotenuse along the board.
The angle you’re interested in reading should be formed right there at the point where the board or rafter intersects with the degree scale of the speed square. And the digit at the point of intersection is the angle.
Mark the angle by drawing a point using a pencil out of the pivot point and not along the hypotenuse. There you’ve it, your angle from the degree scale.
Reading the Common Scale
The common scale is marked as “common” on your speed square. To read the angle, just make sure you don’t confuse the common section with the outer section or the uncommon section.
The common section is marked from numbers 1-30 and it is the one used to read the pitch of a roof.
The speed square is the main tool used while finding the pitch of a roof. However, it is not limited to only this function. There other several uses you can accomplish using the speed square. These functions are as follows.
- Marking Angles.
A speed square is a perfect tool when it comes to marking angles along the surface of a rafter. The speed square has a distinctive lip on its bottom. The lipped edge is identifiable and it is the one placed along the surface of the board. With it held firmly on the edge of the board you can use a pencil to mark angles that are perpendicular to the square. You can use the speed square to mark 45 degrees within the angled edge of the triangle.
2.Measuring common angles
The speed square is composed of a conventional English ruler along with one of its right-angled edges. The ruler is either 7’’ or 12’’ and can be used for accurate measurements of cuts while finding the pitch of a roof. Immediately below the ruler is a triangular cut out which has a series of notches marked at regular intervals of ¼ inches. By holding a pencil in the right notch you can run the fence of the speed square along the surface of the board. This will result in accurate marks on the surface of the wood. To check the accuracy of the internal angles in the speed square, you’ll use the right angle edge of the square.
3. Guiding circular saw.
A speed square is a preferred tool when it comes to guiding a circular saw while cutting along the boards. The peed square has a thick fence along which the edge of a circular saw moves smoothly.
- The speed square can be used as a protractor.
While finding the pitch of a roof, the speed square can still be used as a protractor. This is done by finding the pivot of the speed square and placing it perpendicularly along the length of the board. With the protractor markings of the protractor at the bottom on the same perpendicular position, you can move the square to mark the desires angles like 45 on the square. This means the square is at 45 degrees to the rafter and you can mark and cut it out.
In conclusion the speed square is one of the important in the possession of a carpenter or contractor. This is because it is a multipurpose tool and can be used for different functions especially when it comes to finding the pitch of a roof. It’s a combination of a ruler, try square, a protractor, and a saw guide for cutting accurate 45 or 90 degrees using a hand or circular saw.
It is a tool that has many functions including measuring perpendicular lines to the edge of a board while finding the pitch of a roof. It is also used in measuring and marking accurate angles along the edge of the rafter board or shingles. The speed square is used in finding and measuring common angles especially the pitches of rafter boards and roofs.
The interesting news is that a speed square can be very reliable when it comes to finding the pitch of a roof. It is very accurate and easy to use. The speed square is also given preference by contractors and carpenters as it can be used for many functions. This means you don’t need to carry many tools.